
Mainly targeted to public sites, Google Analytics can also be used to monitor your SharePoint or Office365 intranet. It will not only help you understand if employees are using the company intranet but also how they are using it and if anything needs to be improved.
Below I explain step by step how you can build and deploy a script link using a custom action in SharePoint, and will also provide the installation files and the instructions to use the script in case you don’t want to build it yourself.
UPDATE: Looking to add Google Analytics 4 (GA4) to SharePoint? Click here to learn how...
How to setup Google Analytics
Before we get into the SharePoint bits let’s set up Google Analytics and get everything you need.
- Sign in to your Analytics account
- Select the Admin tab
- Select an account from the menu in the Account column, or Create New Account if you don’t have one already
- Select a property from the menu in the Property column
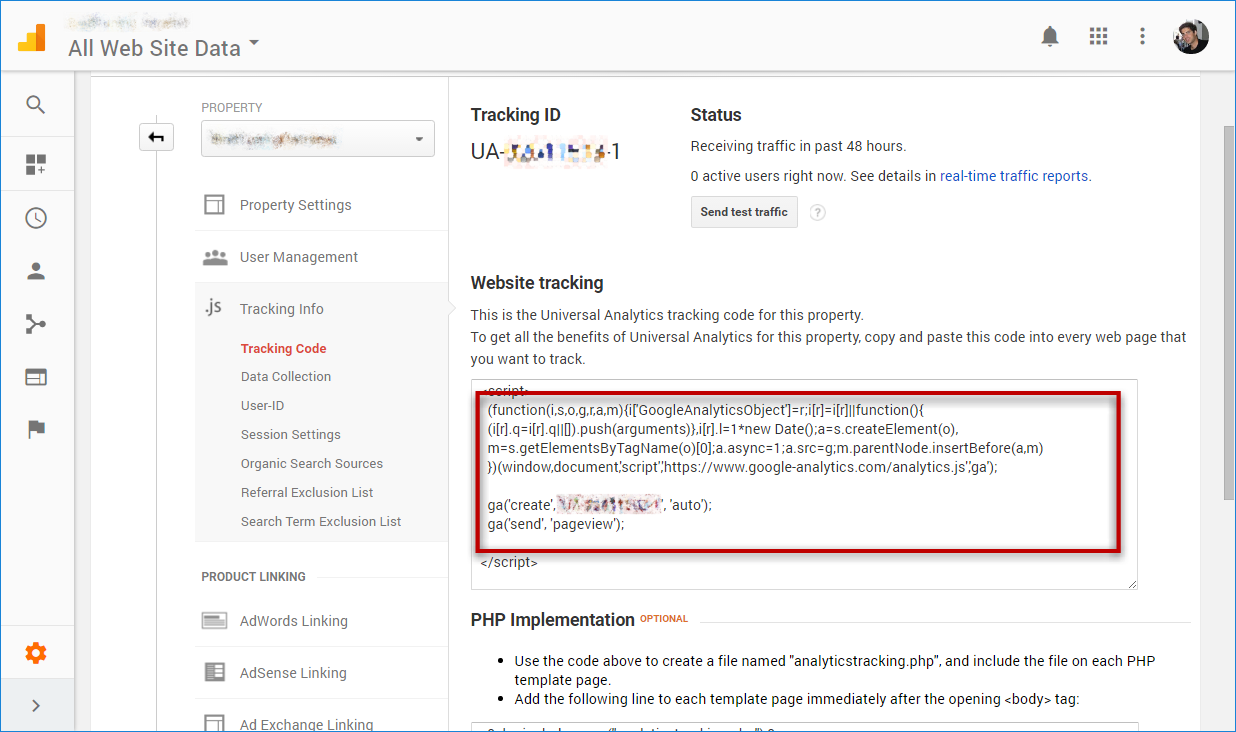
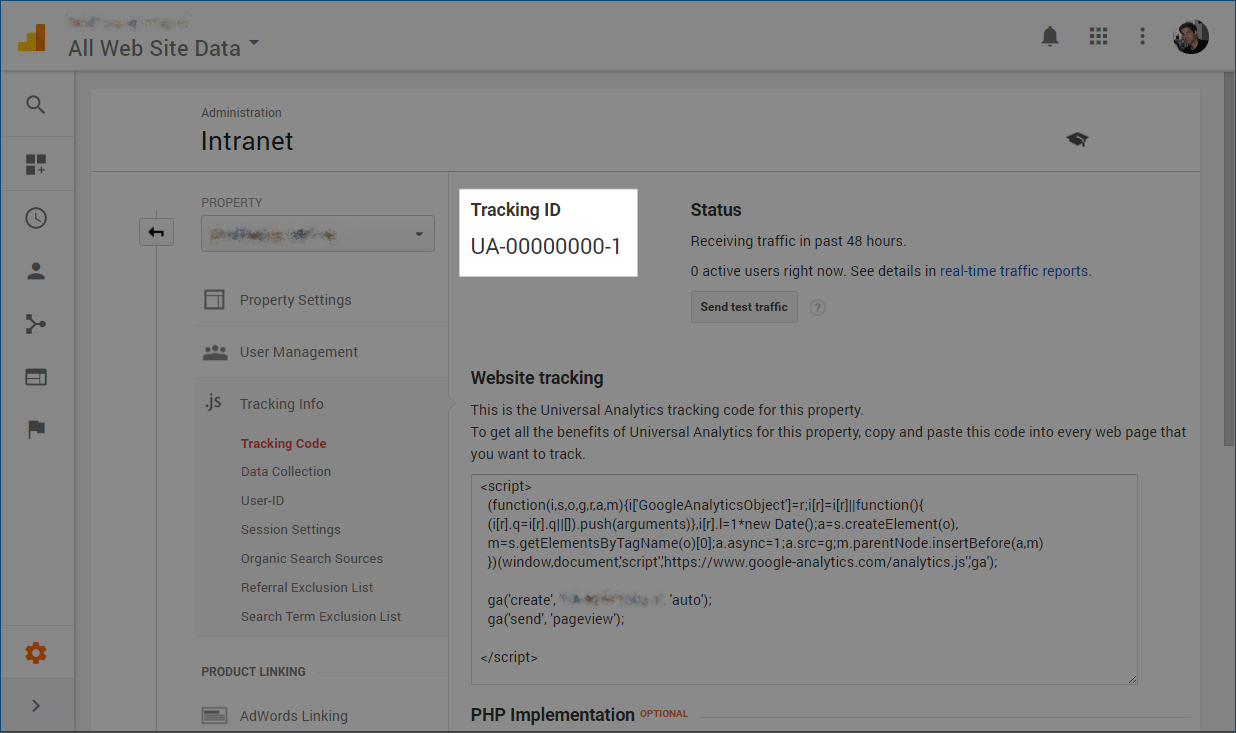
- Under Property, click Tracking Info Tracking Code
- Save the Website tracking script code
Find more information about google analytics setup
Create SriptLink Custom Action
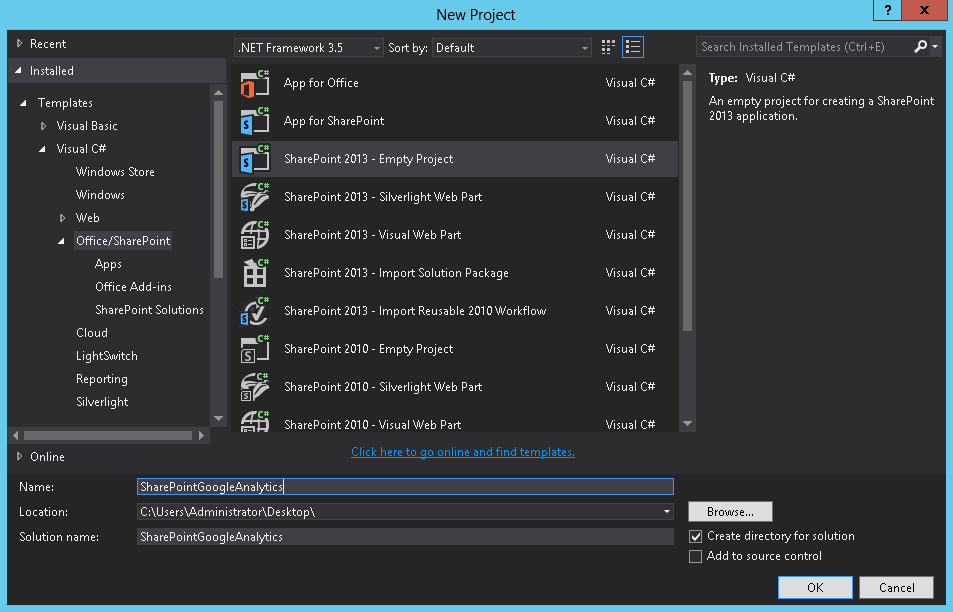
- Open Visual Studio and create a new project
- Select Office/SharePoint templates and SharePoint Empty Project
- I will call it SharePointGoogleAnalytics, but you can call it whatever you want
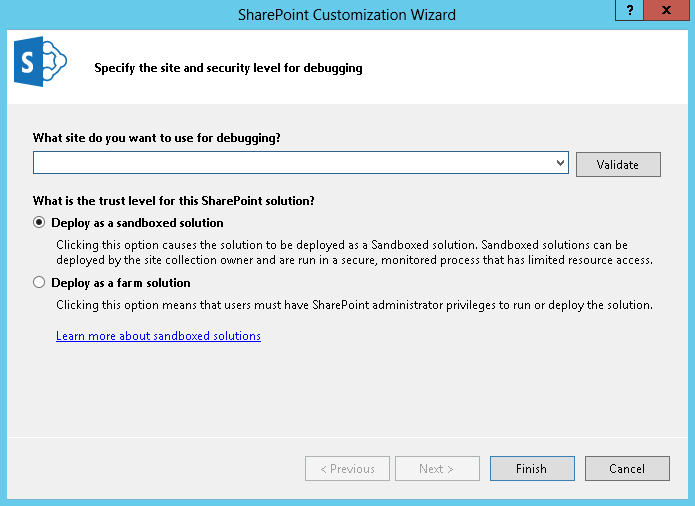
- Provide the URL of the site you will use to debug
- Select Deploy as sandboxed solution and click Finish
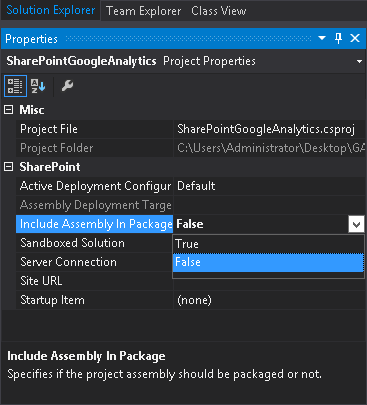
- Once your project opens, go to the Properties and set Include Assembly in Package to False. This is required to build a declarative sandbox solution
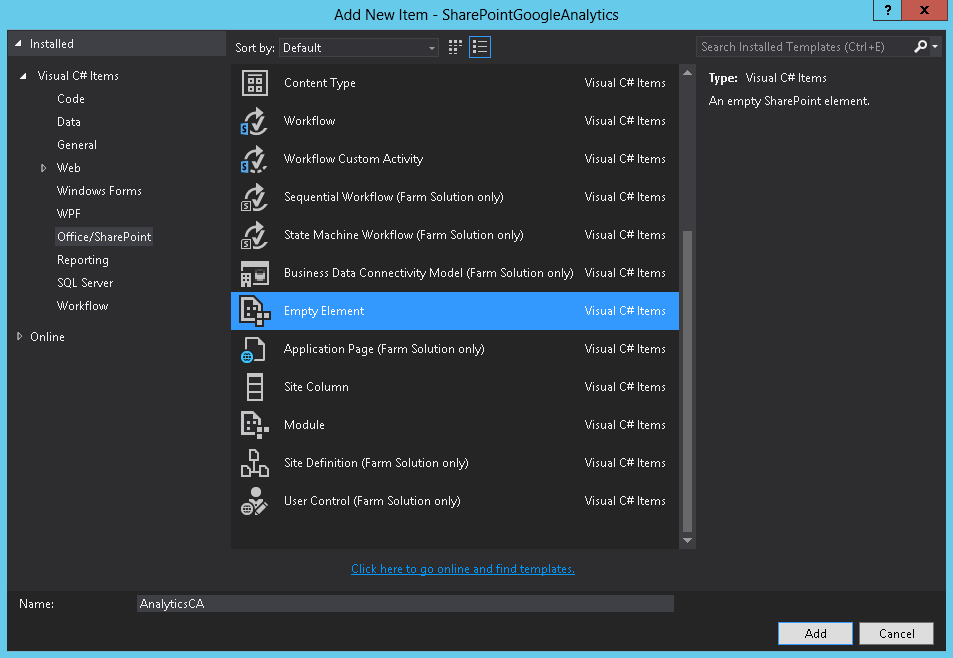
- Right click on your project, go to Add and select New Item
- Select Empty Element and call it AnalyticsCA - this will be the ScriptLink Custom Action
- Right click on your project again, go to Add and select New Item
- Select Module and call it Style Library
- Delete the Sample.txt file that is created by default
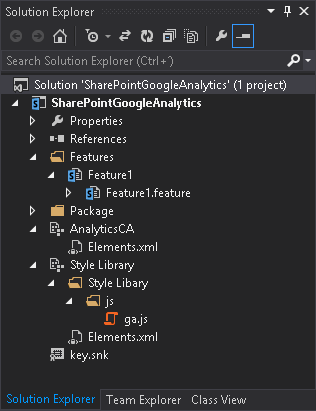
- Create the folder structure bellow inside the Style Library Module GoogleAnalytics js
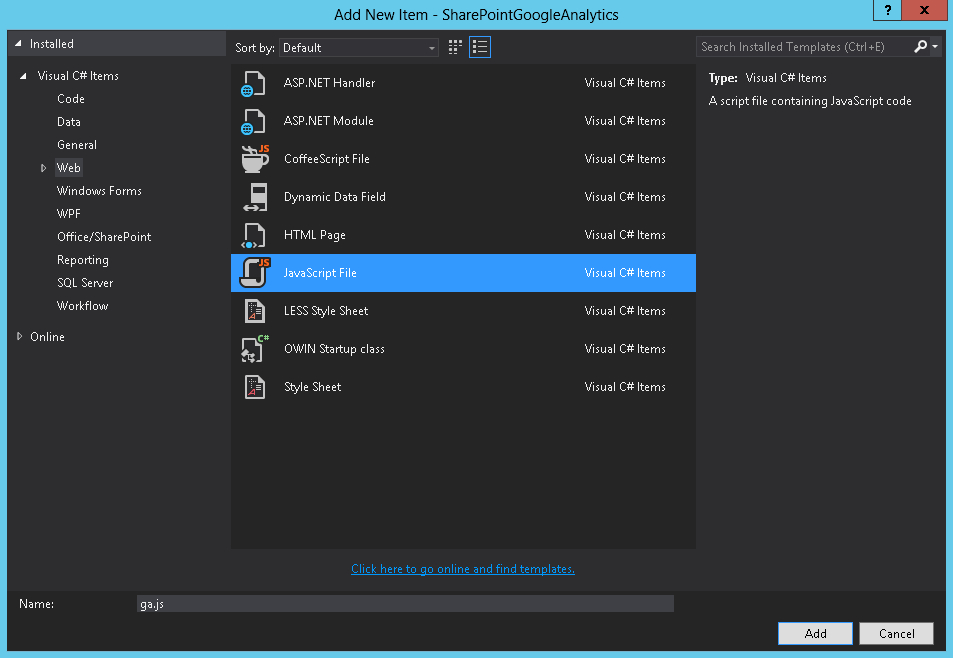
- Right click in the js folder, go to Add and select New Item, from the Web group select the JavaScript File and call it ga.js
- At this point, your project structure should look like the image bellow
- Open the Elements.xml file inside the Style Library module. This file is generated by Visual Studio automatically. However, I prefer to modify it and publish the files automatically once the solution is activated. I also replace the files, if a previous version already exists in the system.Select the entire content of the file and replace it with the code bellow.
Note: If you are not using the same names I used previously, make sure you adjust the URL and Path
<?xml version="1.0" encoding="utf-8"?> <Elements xmlns="http://schemas.microsoft.com/sharepoint/"> <Module Name="StyleLibraryJS" Url="Style Library/GoogleAnalytics/js" RootWebOnly="FALSE" Path="Style Library\GoogleAnalytics\js"> <File Url="ga.js" Type="GhostableInLibrary" Level="Published" ReplaceContent="TRUE" /> </Module> </Elements> - Open the Elements.xml inside the AnalyticsCA module and paste the code bellow.
- Open the Features folder and rename the Feature1 to GoogleAnalytics feature
- Open GoogleAnalytics feature
- Type a Title and Description for your features. Both fields will be visible on your site collection
- Change the scope from Web to Site, this way the script will be deployed to all the sites in the site collection

- Open the ga.js file in the Style Library module and paste there the script code you got from Google, without the script tags. Your code will be like the code bellow, except for the Track ID.
(function(i,s,o,g,r,a,m){i['GoogleAnalyticsObject']=r;i[r]=i[r]||function(){ (i[r].q=i[r].q||[]).push(arguments)},i[r].l=1*new Date();a=s.createElement(o), m=s.getElementsByTagName(o)[0];a.async=1;a.src=g;m.parentNode.insertBefore(a,m) })(window,document,'script','https://www.google-analytics.com/analytics.js','ga'); ga('create', 'Track ID', 'auto'); ga('send', 'pageview'); - Compile your project and deploy the solution to all the site collections you want to track
<?xml version="1.0" encoding="utf-8"?>
<Elements xmlns="http://schemas.microsoft.com/sharepoint/">
  <CustomAction
    ScriptSrc="~SiteCollection/Style Library/GoogleAnalytics/js/ga.js"
    Location="ScriptLink"
    Sequence="1">
  </CustomAction>
</Elements>
This XML file will register the custom action and will execute the ga.js on all sites of your site collection.
Once you deploy the solution, your Google Analytics dashboard will immediately display real-time data.
Install Google Analytics on SharePoint
To install the solution in your SharePoint and start tracking your sites follow these steps:
- Download the solution
- On your site collection root site go to Settings Site Settings Solutions
- Upload and activate the solution. Once you activate the solution, the Google Analytics script is immediately added to your site however, it is not tracking your site yet, you still need to add your track id to the script
- Open your site with SharePoint designer
- Go to All Files Style Library Google Analytics js
- Check out and edit the ga.js file in advanced mode
- Locate the words TRACK ID and replace it with your own track id from Google Analytics
- Save the file, check it in and publish it as a major version.
That’s it, you are good to go! Your site collection is now being tracked by Google Analytics.
If you have multiple site collections and don’t you want to open SharePoint Designer for each site collection, to edit the JavaScript file, you can use my SharePoint WSP Repackage tool to modify the solution and create your own unique WSP with your Track ID.
How to deactivate Google Analytics tracking
If you want to stop tracking a specific site collection do the following:
- On your site collection root site and go to Settings Site Settings Site Collection Features
- Locate the Google Analytics feature and deactivate it


Conclusion
In this article, you have learned how to add Google Analytics to SharePoint without editing the master pages and also how to create a script link custom action.
If the master page was blocking the analytics adoption in your company either because you are on SharePoint Online or because you don’t want to break your beautiful custom master pages, this is the way to go.
Unfortunately, this solution will not work on the new Team Sites and Document Libraries on SharePoint Online because for now, there are no script sites available. As soon as something comes out to support those sites I’ll review this article again.
As always the source code of this project is available on my personal GitHub repository and you can download the WSP solution from this article, the links are down below.