
Microsoft Teams makes it easier than ever to collaborate with the right people — both inside and outside of your organization. In this Microsoft 101 article, I'll show you how to add guest accounts because adding guest users in Microsoft Teams involves much more than just flipping a switch. When it comes to collaborating with external users, you have a few options...but which one is best?
Microsoft Teams offers you a great way to share documents, files, folders, lists, libraries, and even complete sites in your SharePoint Online. But what happens if you want to collaborate with people outside your organization, or communicate through chat or coordinate meetings with a shared calendar?
In these cases, you can invite someone outside your organization via guest user access in Microsoft Teams. This way, they can access your team's resources, share files, and join a group chat with other team members.
So, let's explore how to collaborate securely using guest access in Teams.
Add guest account access to Microsoft Teams
For external users to be granted guest access, you need to have guest access enabled as an org-wide setting in Teams - it is turned off by default.
To turn on guest access in Teams, you need to be an Office 365 global admin and take the following steps:
- Go to the Microsoft Teams admin center, select Org-wide settings, then click on Guest access.
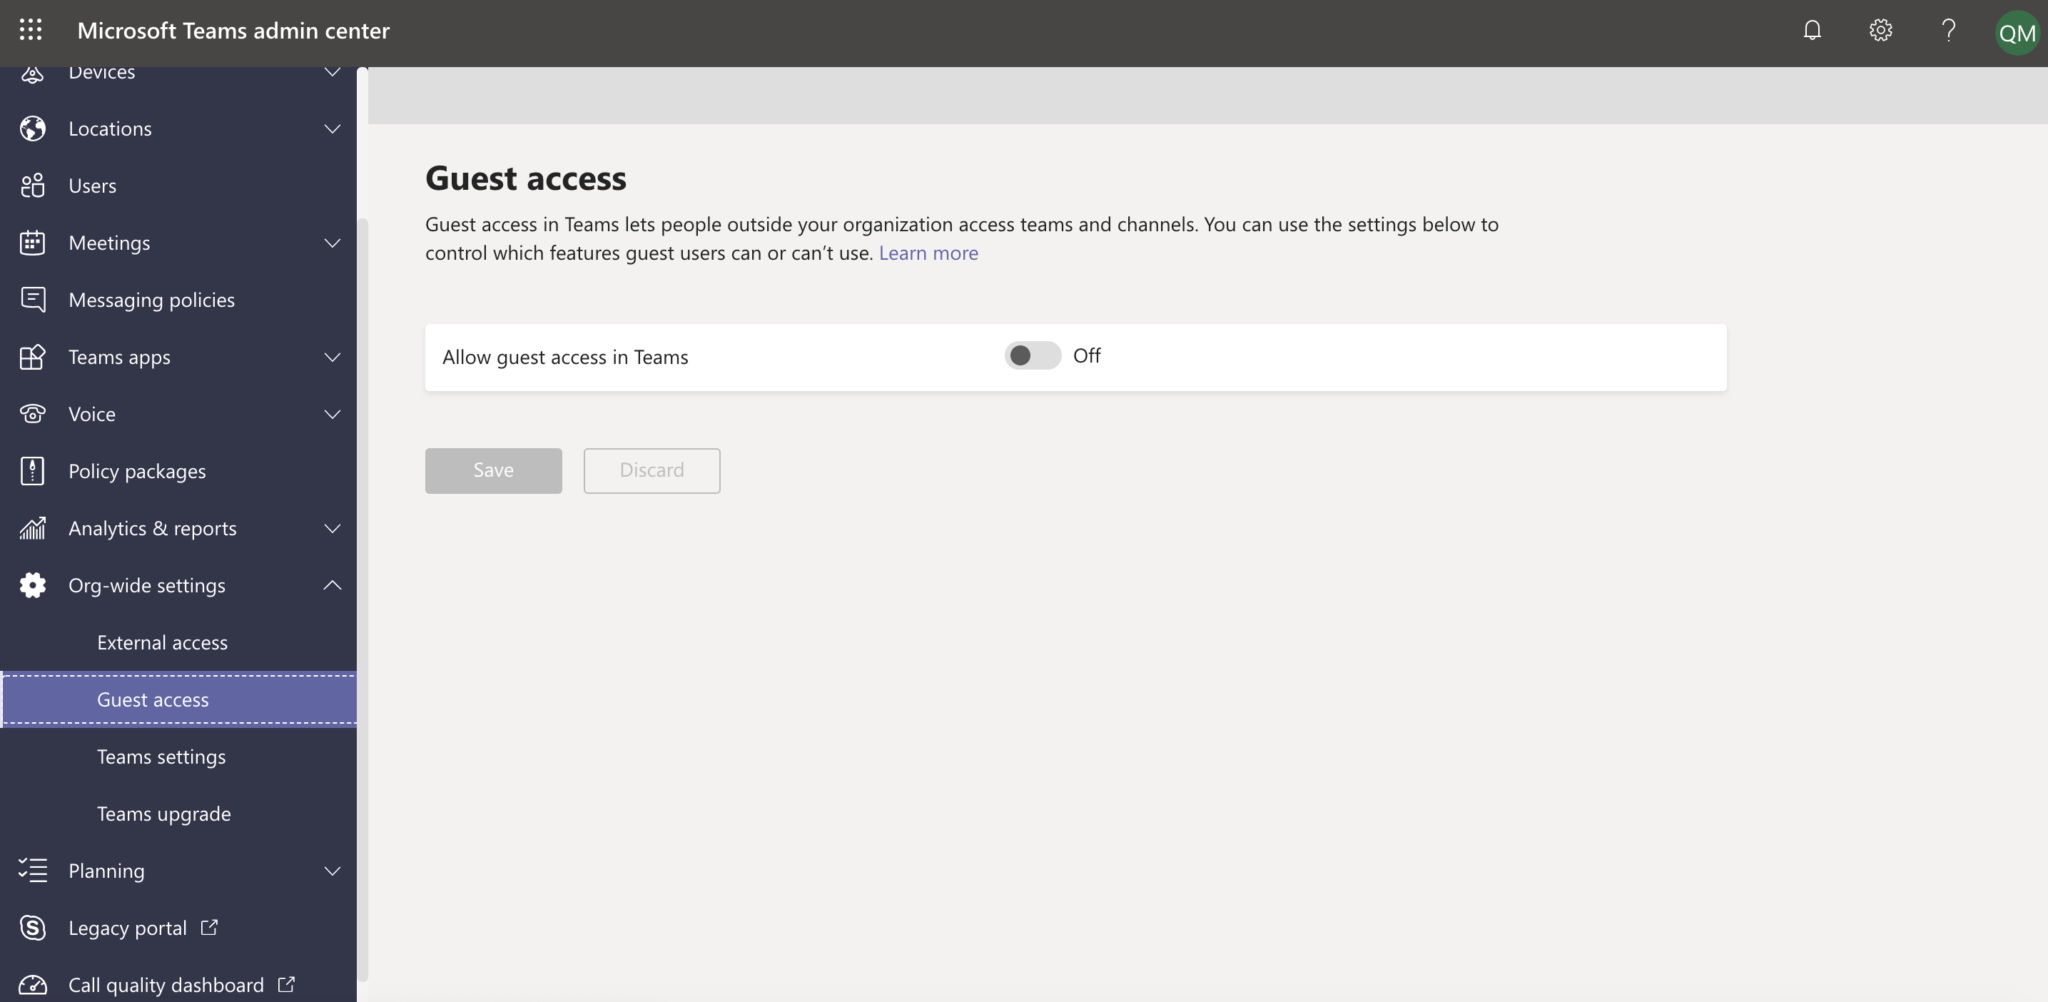
- Toggle the Allow guest access in Teams switch to On. Then click Save.

Configure guest account access in Microsoft Teams
Once you’ve enabled guest access, it’s time to specify exactly what guests will be allowed to do and see in your teams.
The page in the Teams admin center where you enabled guest access is also where you can configure Calling, Meeting, and Messaging settings for guests.
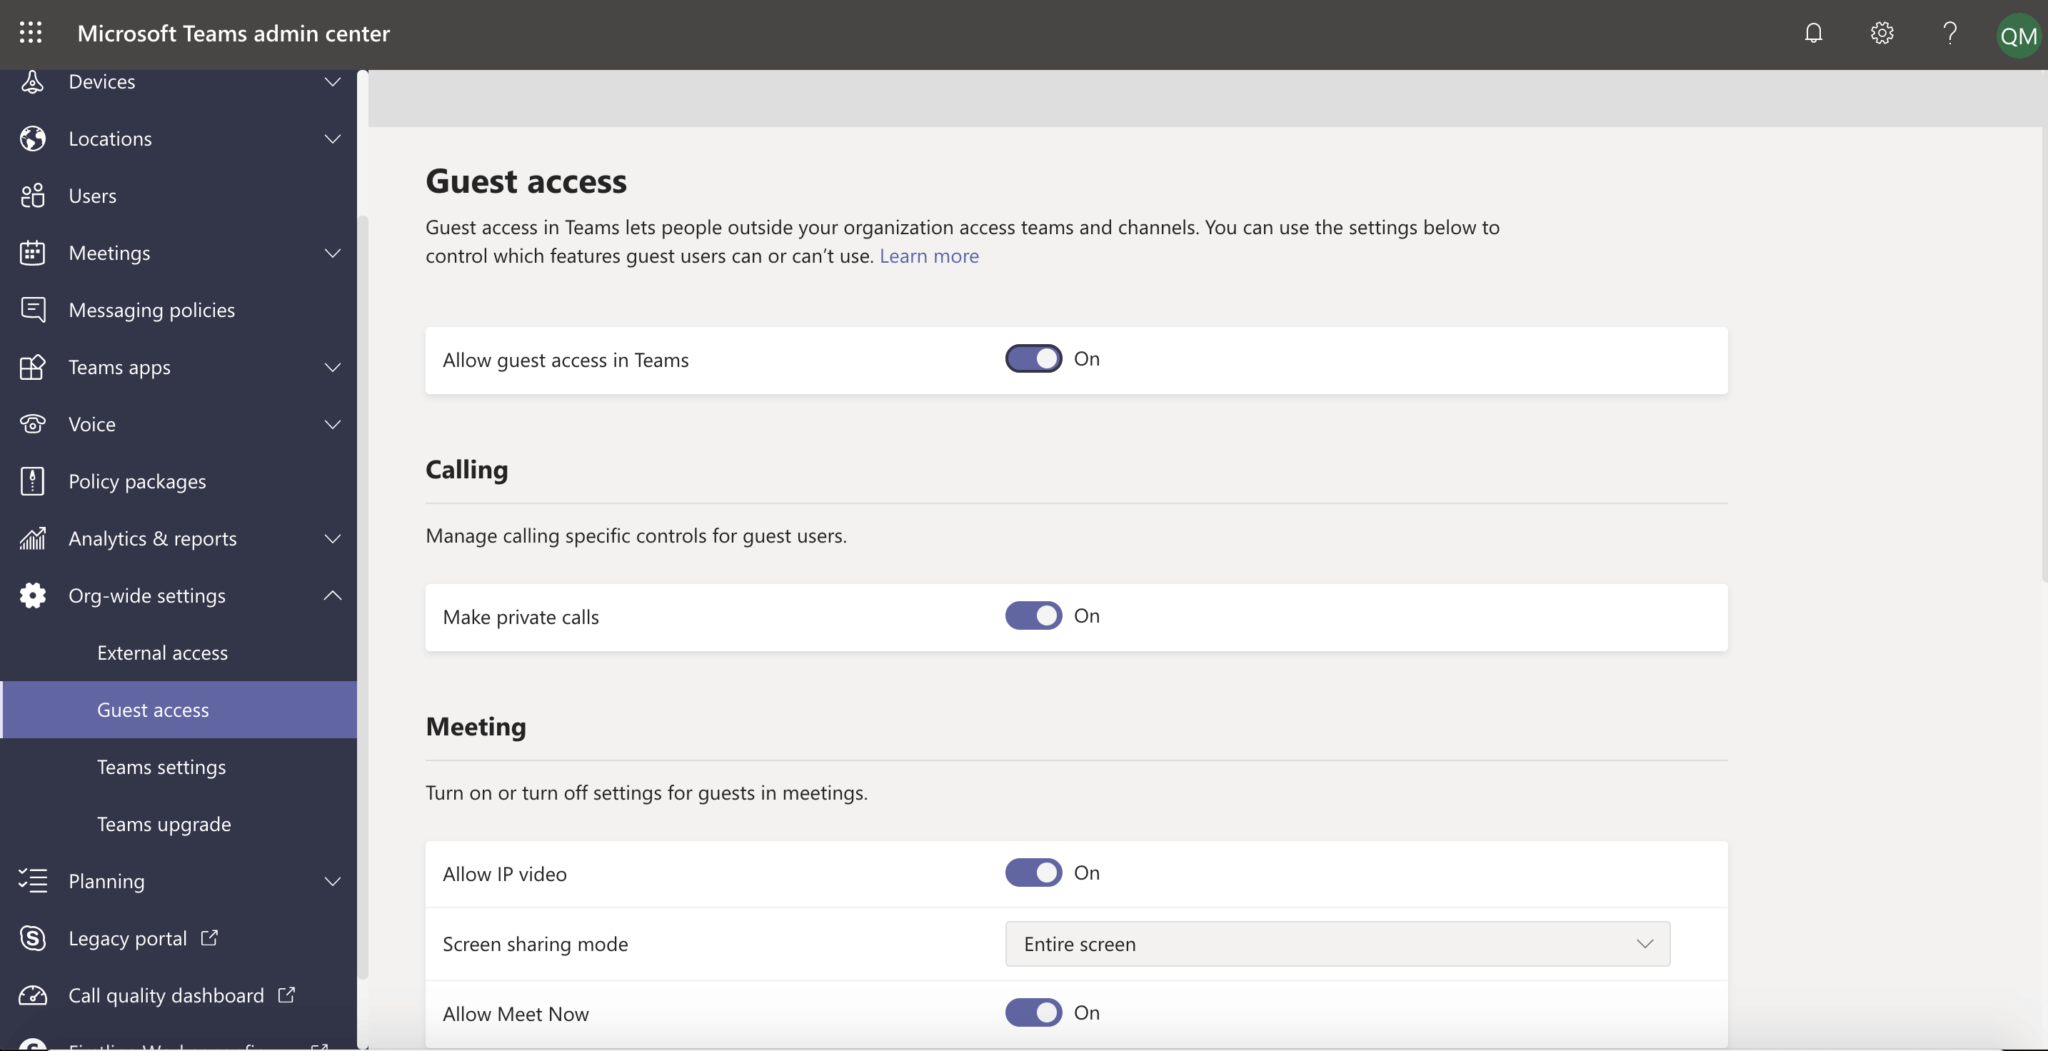
Go to the same page in the Teams admin center where you enabled guest access...
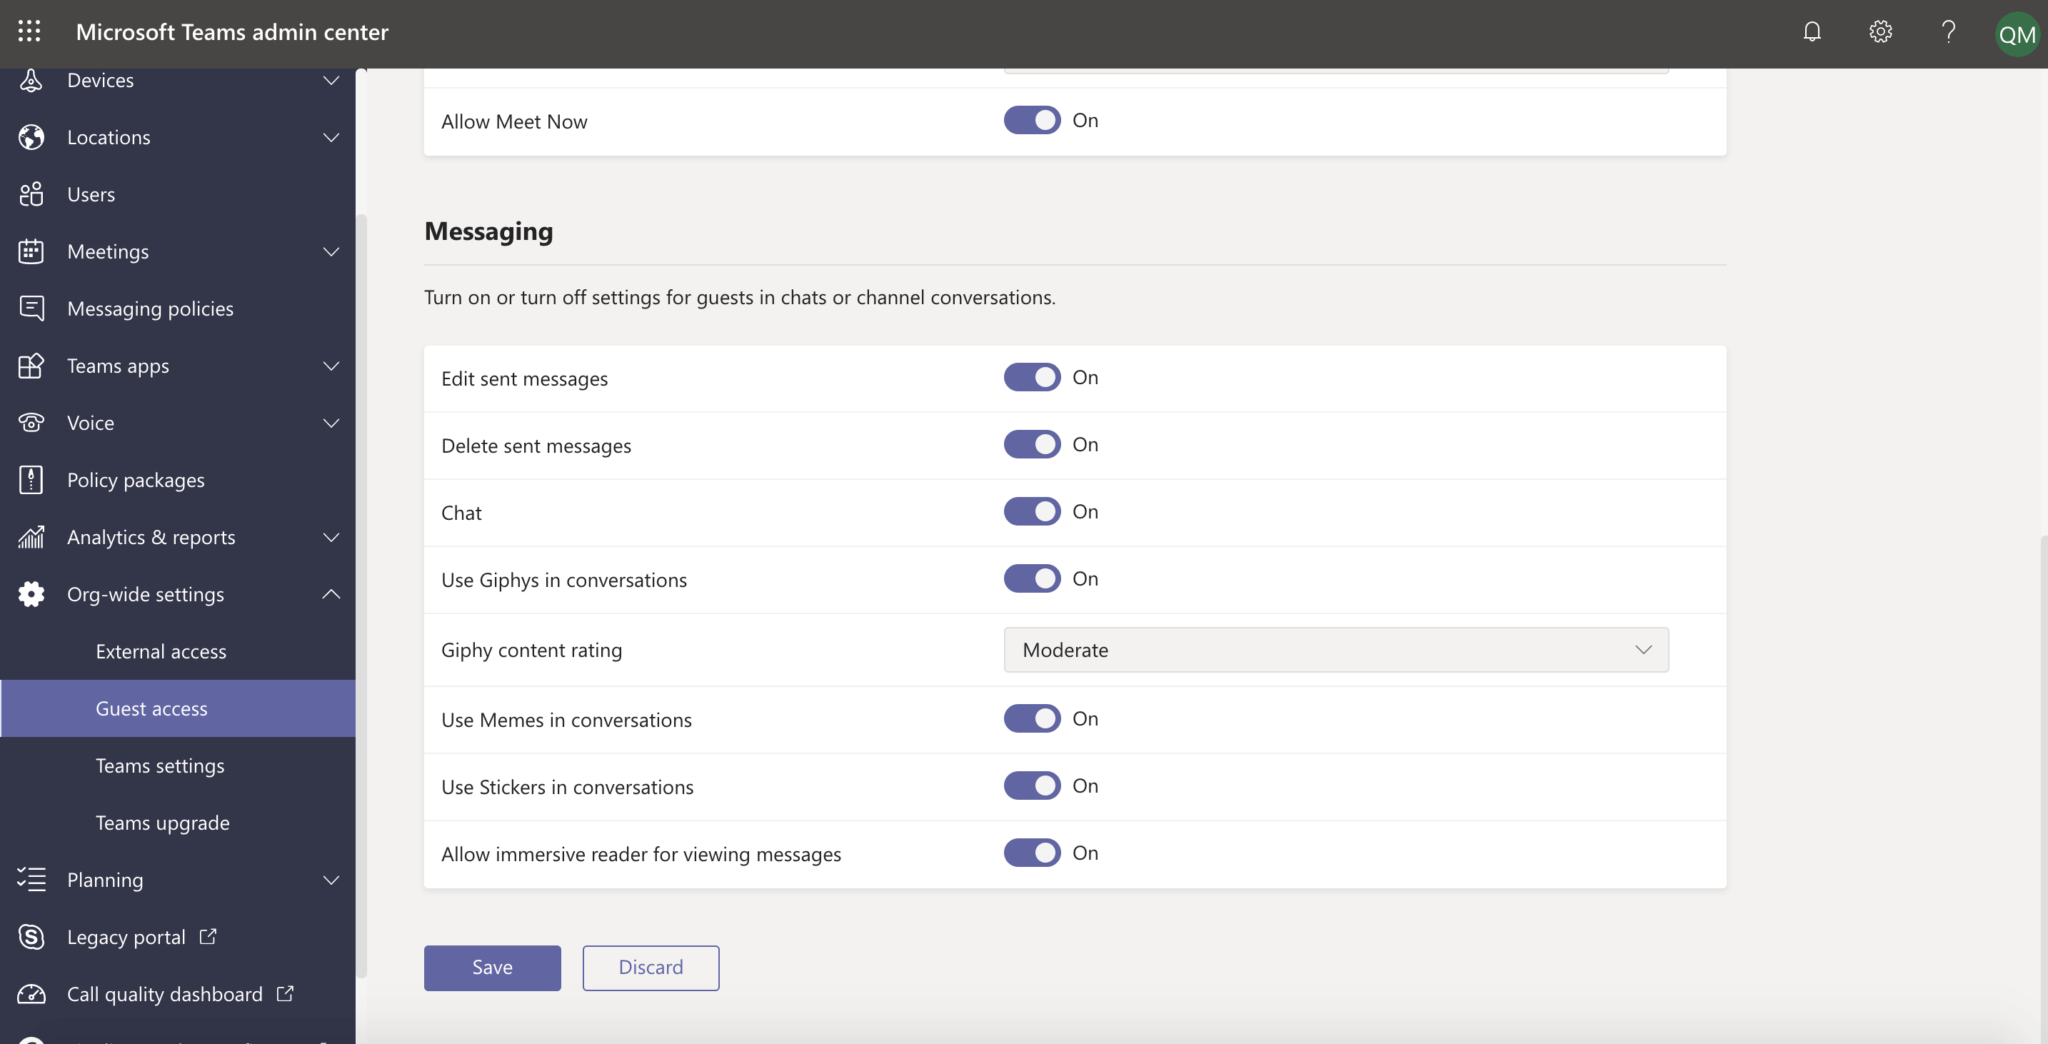
...and scroll down to configure all the Calling, Meeting, and Messaging settings.
Depending on what you want to allow, you can select On or Off for the following capabilities:
- Make private calls
- Allow IP video
- Screen sharing mode
- Allow Meet Now
- Edit sent messages
- Guests can delete sent messages
- Chat
- Use Giphys in conversations
- Giphy content rating
- Use memes in conversations
- Use Stickers in conversations
Click Save to apply your new settings.
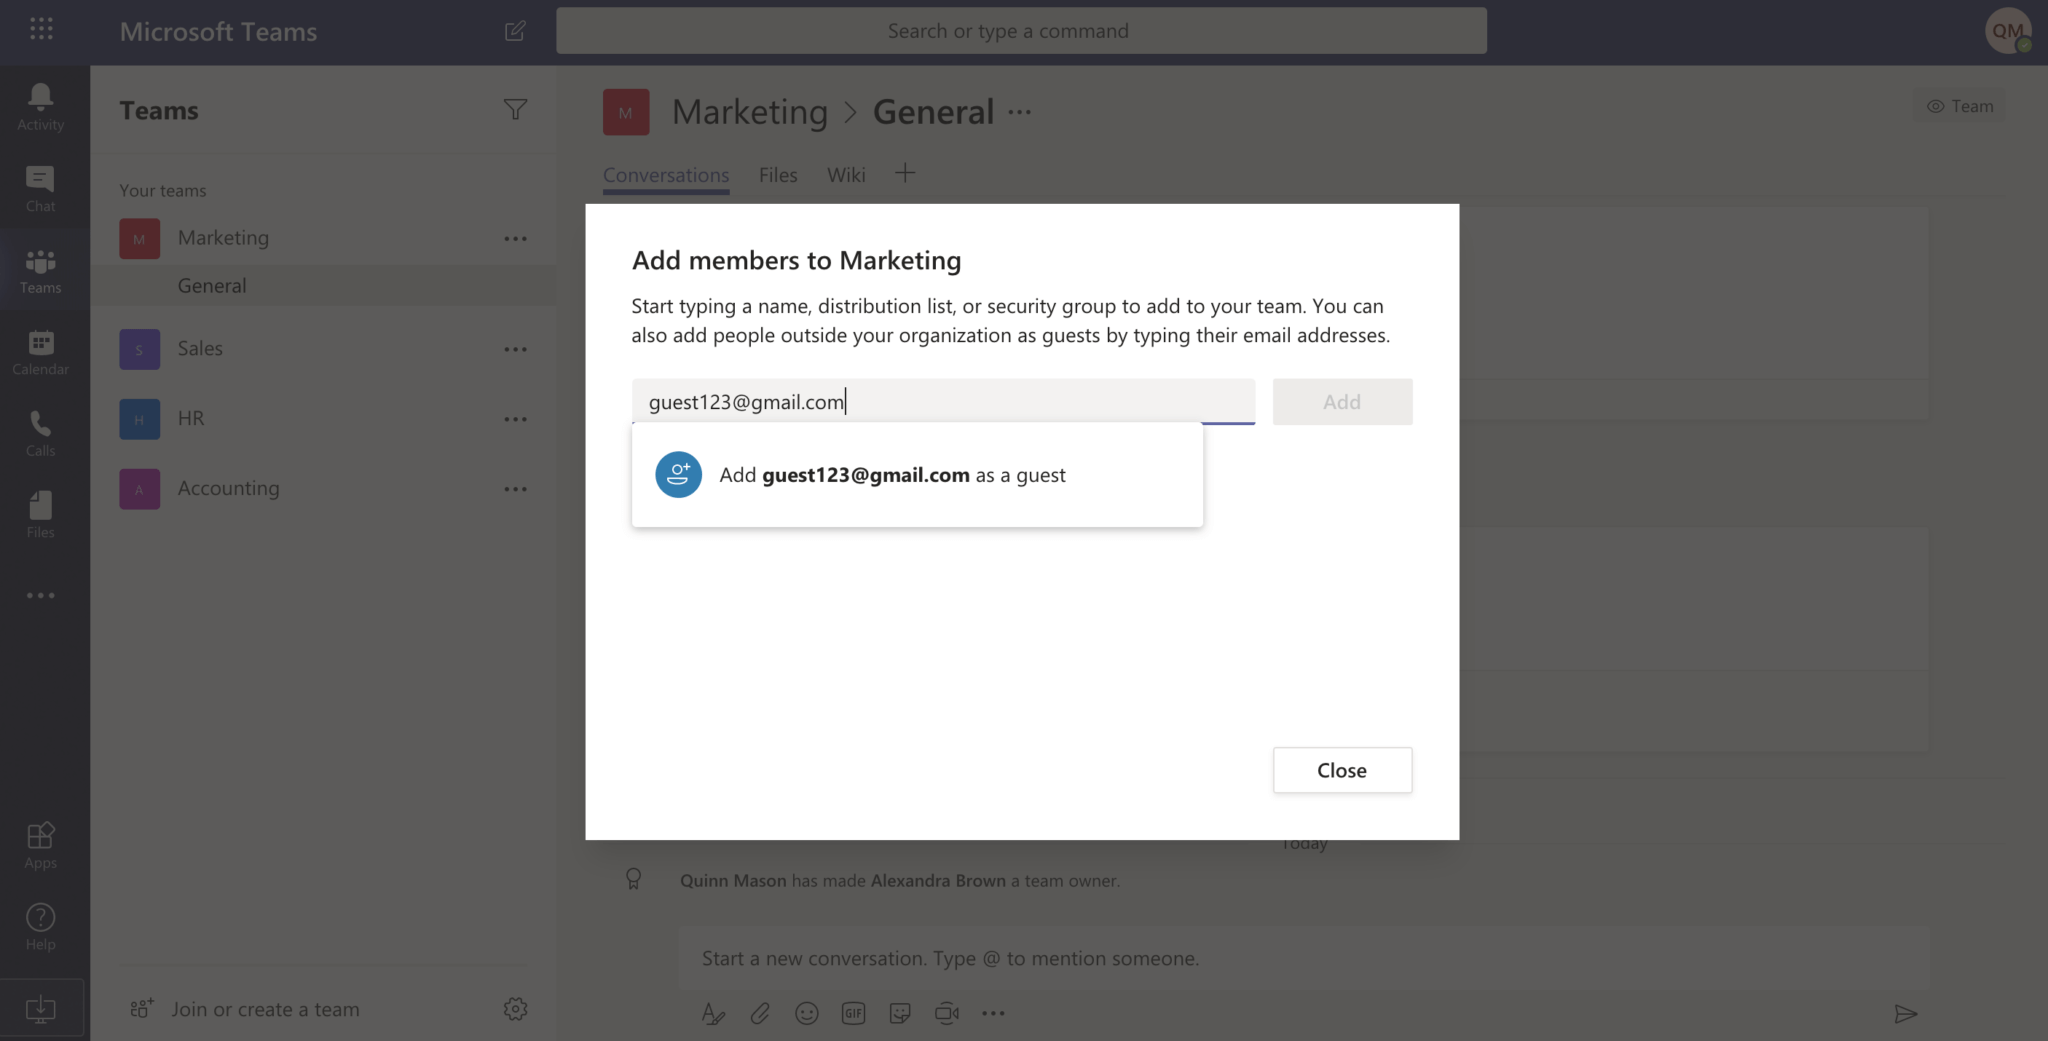
Add a guest account to your team in Microsoft Teams
Once you've enabled guest access and configured your org-wide settings to your liking, it's time to start adding some guests!
Only team owners can add a guest in Teams, so if you're an IT admin you might need to make yourself an owner of a team before you can start adding guests to it. (You can do this is in the Teams admin center by selecting Teams > Manage Teams)
To add a guest to your team in Teams:
- In the Teams app, select Teams on the left sidebar and go to the team where you want to add a guest.
- Select More options (using the triple-dot icon) then Add member.
- Enter the guest's email address, then click on Edit guest information to give them a user-friendly name. Then click Add. Your guest will receive a welcome email invitation.
For more details, check out the official Microsoft documentation.
Hope this helps! Be sure to check out all of the Microsoft Teams 101 articles on our blog.